 |
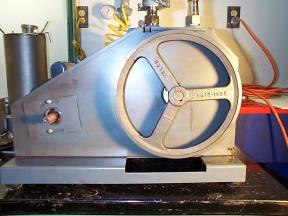
Remove the Belt Guard by opening the two spring lever clips at each
end of the belt guard. There is a small tab at the top of the gaurd
mount assembly that is dissengaged when lifting up. Clean the belt
guard with a mild detergent such as a dilute 'simple green' solution and
set aside.
|
 |
Drain the pump oil into a suitable container. There is a waste oil drum in the Gas Handling room. It is clearly marked for waste vacuum pump oil. Empty the container that you use there. If the oil is still good you need only drain the oil to below the level of the shaft. However, this is an opportune time to change the oil. |
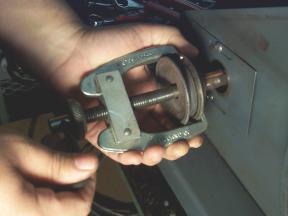 |
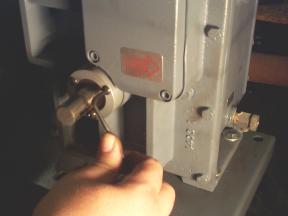
Look carefully at the motor pulley and locate the allen set screws that attach the pulley to the motor shaft - there will usually be one, but there can be two. Loosen (do not remove) the allen screws. Using a small wheel puller, remove the motor pulley. Note that the jaws of the puller are *not* in the belt track. Place the shaft's square key in a secure place so that it can be located during reassembly. |
 |
Look carefully at the pump pulley and locate the allen set screws that attach the pulley to the pump shaft. Here again, there may be one or two screws that are used. |
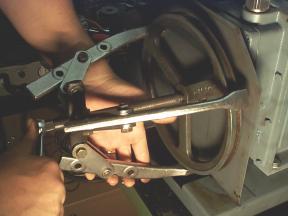 |
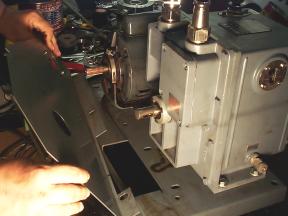
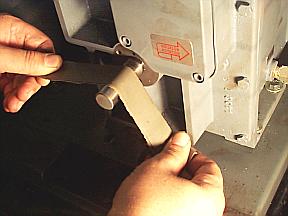
Using a large wheel puller, remove the pump pulley. The larger pullers are configured with 3 jaws and can be dificult to set in place. Be patient and let gravity assist you by hooking the two top jaws in place and adjusting the center screw until the third jaw can be set. In this case, a woodruff key (semi-circular) is used and must be placed in a secure location to prevent loss. |
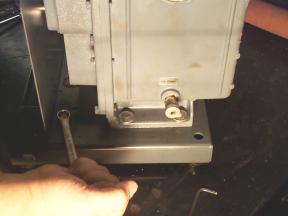 |
Loosen the two 5/16-32 screws that hold the rear belt guard mount assembly to the pump base. The two nuts and lock washers can be reached through the pump pulley cut out in the pump base. |
 |
|
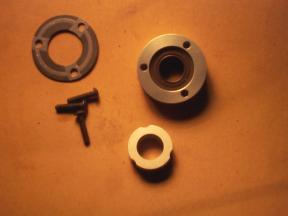 |
Open the new shaft seal box and inspect the contents. Ensure that the kit contains a new gastket, shaft seal, screws, and centering tool. |
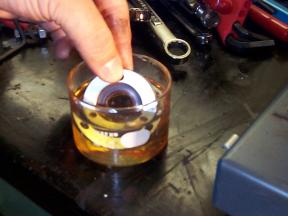 |
When the pump starts for the first time after shaft seal replacement, there must be oil in the seal to lubricate the friction surfaces until the pump's own lubricating system can catch up. The easiest way to ensure sufficient lubrication at start up is to soak the entire shaft seal in a small amount of pump oil for several minutes. |
 |
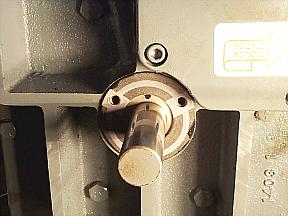
Remove the three screws that hold the old shaft seal in place. |
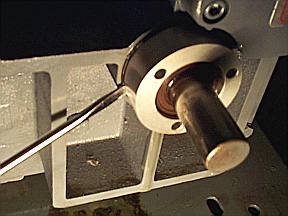 |
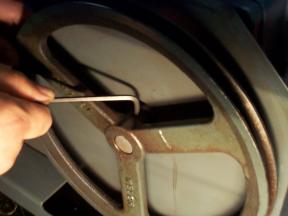
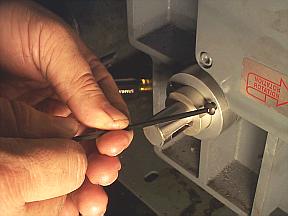
***Carefully*** insert a thin pry tool between the old shaft seal and the gasket. It is important that the pump surface not be scratched. |
 |
The shaft must be prepared to accept the new shaft seal. Wipe all old oil and grease from the shaft. Remove gum build up from old oil and any adhered rubber from previous seal. Using 600 grit paper, smooth the surface of the shaft. Ensure that any scratches left by the abrasive paper are perpendicular to the axis of the shaft. |
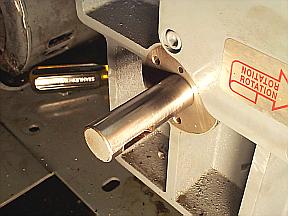 |
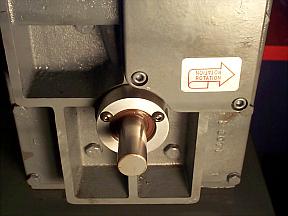
For the new style shaft seal (shown in this tutorial) the shaft should be as smooth as possible. Ensure there are no burrs on the keyway. A well prepared shaft is shown at left. |
 |
The gasket should be installed first. The gasket can be held in plase with a small film of pump oil applied to the rear side of the gasket. |
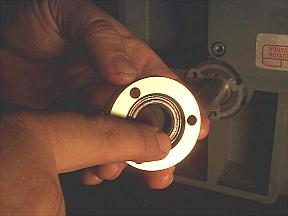 |
Remove the new shaft seal from the oil bath and wipe outer surfaces dry. Note that the elastomer center bit is recessed on one side and flush with the outer aluminum ring on the other. |
 |
Insert the shaft seal centering tool into the recess mentioned above and align the grooves on the centering tool with the shaft seal mounting holes. |
 |
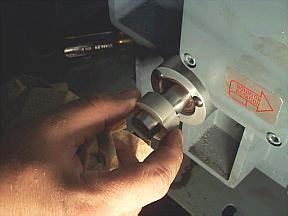
***Carefully*** push the new shaft seal onto the shaft. Note that the centering tool should be on the side nearest you. There will be considerable initial resistance as the elastomer stretches to accept the shaft. This is followed by a reduction in resistance when the shaft seal meets the keyway groove. Try to install the seal with a deliberate and metered pressure. If the keyway has burrs, the shaft seal will be cut during this step, rendering it useless. Install the three socket head pan screws securely while the centering fixture is in place. |
 |
Remove the centering tool. |
 |
At left, the completed shaft seal installation is shown. To finish up, re-install the rear belt guard assembly and the pump and motor pulleys. Use care in aligning the belt-ways on the pulleys. Ensure that the pulleys will not hit the belt guard. Re-install the outer belt guard assembly. ***REFILL THE PUMP WITH OIL*** Test the pump's operation and ensure that there are no oil leaks from the shaft. Cleaning the belt guard, pulleys, and motor base with mild detergent such as dilute 'simple greeen' will aid in detecting new leaks. |